Halloween is the perfect time to get a little spooky in the kitchen, and Easy Halloween Dirt Cups are the ultimate treat that both kids and parents love. These no-bake desserts combine layers of creamy chocolate pudding, crushed cookies that look like “dirt,” and playful candy toppings like pumpkins and gummy worms. Not only do they look festive, but they’re also simple enough for kids to help create, making them a fun activity as well as a delicious snack. Perfect for classroom Halloween parties, after-school treats, or family gatherings, these dirt cups are endlessly customizable. In this guide, we’ll walk through a step-by-step recipe, fun variations, and creative serving ideas so you can whip up a batch of spooky goodness with ease.

How Halloween Dirt Cups Became a Family Tradition
Growing up, one of the highlights of October was the school Halloween party. Among the candy corn and cupcakes, nothing grabbed the kids’ attention quite like dirt cups. The layered look of dark “soil” with candy worms peeking out made them strange yet irresistible—you felt like you were eating something spooky, but it was delicious. Dirt cups quickly became a staple of Halloween because they looked impressive even though they were incredibly simple to make. Over the years, they transformed into a nostalgic favorite in my family. Each October, recreating them brought back memories of laughter, costumes, and sharing treats with friends. It’s amazing how a dessert so easy could carry such a strong sense of tradition.
Fast forward to today, and Halloween dirt cups are still a favorite among children. Part of the charm is the visual fun—crumbled cookies that mimic real dirt, gummy worms crawling through layers, and candy pumpkins sprouting on top. The treat feels like edible Halloween magic, which is why they remain one of the top kids Halloween treat ideas. Parents love them, too, because they’re made with accessible, budget-friendly ingredients and don’t require any special baking skills. Plus, each serving comes in its own cup, making them easy to pass out at school or parties. For kindergarteners especially, dirt cups are the perfect Halloween treats—just the right size, colorful, and playful enough to light up little faces.
These little dirt cups have grown from classroom nostalgia into a timeless activity that brings families together. Every scoop of pudding and sprinkle of crumbs lets kids feel creative, and parents appreciate a fun dessert that balances effort with impressive, party-ready results.
Print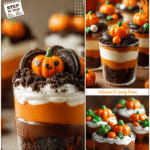
easy halloween dirt cups
- Total Time: 45 minutes
- Yield: 8 servings 1x
Description
These no-bake Halloween Dirt Cups layer creamy chocolate pudding, crushed cookies, and festive candy toppings for a spooky and fun dessert kids love. Perfect for classroom parties or family gatherings, they’re easy to assemble and fully customizable.
Ingredients
Instructions
1. In a bowl, whisk together pudding mix and cold milk until thickened, about 2–3 minutes.
2. Fold whipped topping into the prepared pudding for extra creaminess.
3. Place crushed cookies in a zip-top bag and crush into fine crumbs with a rolling pin or use a food processor.
4. Spoon a layer of pudding into the bottom of each clear cup.
5. Sprinkle a layer of cookie crumbs over the pudding.
6. Repeat pudding and crumb layers until cups are nearly full, ending with crumbs on top.
7. Press a candy pumpkin into the top of each cup.
8. Drape gummy worms over the layers to create a spooky effect.
9. Refrigerate for at least 30 minutes before serving.
10. Add any remaining candy just before serving for best texture.
- Prep Time: 15 minutes
- Cook Time: 0 minutes
Nutrition
- Calories: 250
- Sodium: 150
- Fat: 10
- Carbohydrates: 35
- Protein: 3
Ingredients, Supplies, and Tools You’ll Need
These dirt cups use just a few simple, pantry-friendly ingredients. Since they’re no-bake and easy to assemble, kids can help at nearly every step. To keep things clear, here’s a complete ingredient list for a standard batch of Easy Halloween Dirt Cups.
Kid-Friendly Ingredients for Dirt Cups
| Ingredient | Amount | Notes |
|---|---|---|
| Chocolate pudding mix | 2 (3.9 oz) boxes | Instant pudding works best |
| Cold milk | 4 cups | For mixing with pudding |
| Chocolate sandwich cookies | 20–24 cookies | Crushed into dirt-like crumbs |
| Whipped topping (thawed) | 1 (8 oz) container | Makes pudding lighter and creamier |
| Candy pumpkins | 8–10 pieces | For decorating the “pumpkin patch” top |
| Gummy worms | 8–10 pieces | Add spooky crawling effects |
Tools and Supplies
- Clear plastic cups or mini mason jars
- Mixing bowls
- Whisk or electric mixer
- Spoons or spatulas
- Rolling pin or food processor
- Zip-top bag
Kid-involvement tip: Crushing cookies in a sealed bag with a rolling pin is a mess-free and exciting task kids love. Safe, easy, and they feel like part of the baking team!
Step-by-Step Instructions for Dirt Cups
Preparing the Pudding and Crushed Cookies
- Mix the pudding – In a large bowl, whisk together the pudding mix and cold milk. Stir until thickened, about 2–3 minutes. Fold in whipped topping for extra creaminess.
- Crush the cookies – Place cookies in a zip-top bag. Let kids gently crush them with a rolling pin, or use a food processor for speedier results.
Assembly and Decoration
- Layer the treats – Spoon pudding into the bottom of each cup, then sprinkle cookie crumbs. Repeat until nearly full, ending with a cookie crumb layer.
- Add Halloween magic – Place candy pumpkins on top and drape gummy worms to “crawl” out of the dirt for a spooky effect.
- Chill before serving – Refrigerate for at least 30 minutes to let pudding firm up.
Presentation tip: Add stickers, jack-o’-lantern faces, or ribbons to cups for an extra festive touch.
Creative Variations of Dirt Cups
Different Flavors & Candy Decorations
Instead of sticking with chocolate pudding, try vanilla tinted orange, green, or purple with food coloring for a Halloween spin. Gummy worms and candy pumpkins are classics, but candy bones, candy skulls, or candy eyes can create a graveyard or monster-inspired look. These small additions help transform your dessert table into something truly magical and spooky.
Healthier Alternatives
For a lighter option, swap sugar-free pudding or Greek yogurt as the creamy base. Gluten-free sandwich cookies or chocolate graham crackers make excellent alternatives, and fresh fruit like strawberries or mandarin orange segments can replace candy for natural sweetness. Even small fruit toppings keep the cups festive while adding a nutritious element for kinder-friendly options.
Serving Halloween Dirt Cups at Parties
Classroom-Friendly Halloween Treats for Kindergarteners
Individual clear cups or mini jars make classroom servings simple and mess-free. Choose nut-free ingredients where possible, and provide a quick list of ingredients for teachers or parents concerned with allergies. Dirt cups can be made the night before, chilled, and transported safely in a cooler so they’re ready to serve during the party.
Fun Presentation Ideas
Get creative with Halloween-themed stickers, jack-o’-lantern faces drawn on cups, or mason jars tied with festive ribbons. You can even name each version for effect: “Pumpkin Patch Dirt Cups,” “Wormy Graveyard Cups,” or “Monster Mud Cups.” These fun names make them double as treats and décor in one.
Frequently Asked Questions
1. Can you make Halloween dirt cups in advance?
Yes, prepare them a day before. Cover and refrigerate, then add candies just before serving.
2. How do you keep cookie crumbs crunchy?
For crunchier crumbs, save the final top layer until serving time and avoid over-crushing.
3. What alternatives work if kids don’t like chocolate pudding?
Vanilla, butterscotch, or cookies-and-cream pudding all work well. Yogurt also makes a lighter base.
4. Are these safe for food-allergy-sensitive classrooms?
Yes, just select allergy-friendly puddings and cookies, and avoid ingredient mixes with nuts. Share an ingredient card with teachers if needed.
5. Can Halloween dirt cups be stored overnight?
Absolutely. Store covered in the fridge, adding toppings closer to serving time for freshness.
Conclusion
When it comes to spooky Halloween food for kids, few recipes are as fun and simple as Easy Halloween Dirt Cups. They bring together everything families love about the holiday—festive looks, easy steps, and tasty layers kids can help make. With no baking needed and budget-friendly ingredients, they’re the perfect solution for school events, after-school snacks, or family Halloween traditions. Whether you stick with the classic version or customize them with creative toppings, these dirt cups guarantee smiles for little goblins and ghouls. This Halloween, try whipping up a batch and watch your party light up with spooky, sweet fun.
