Halloween is the perfect time to get creative in the kitchen, and one of the easiest — and tastiest — ways to do that is with this Easy White Chocolate Halloween Oreo Bark Recipe. This festive treat combines creamy white chocolate, crunchy Oreo cookies, and spooky decorations like candy eyes and colorful sprinkles. It’s quick to make, kid-friendly, and doesn’t require any tricky baking skills, which makes it perfect for busy families and last-minute party prep.
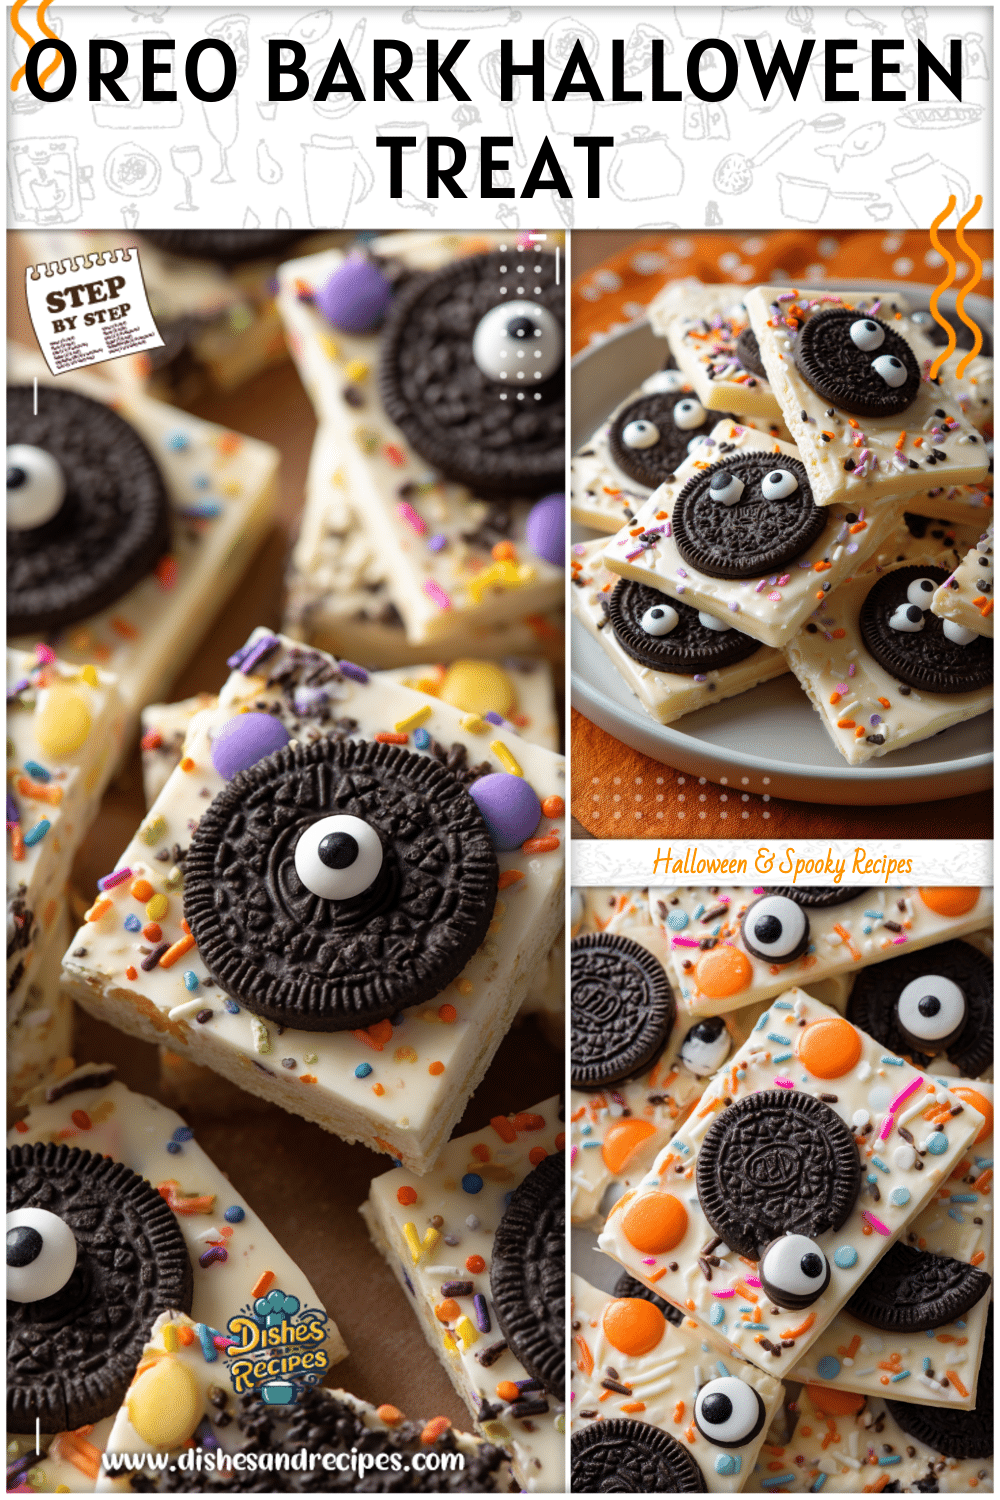
In this article, you’ll discover the story behind this Halloween favorite, get the step-by-step recipe, explore fun variations, and find answers to common questions. Grab your sweet tooth and spooky spirit — this recipe is the perfect way to welcome Halloween celebrations big and small.
A Sweet Halloween Tradition
Growing up, Halloween always meant more than just costumes and trick-or-treating — it was a time to gather in the kitchen and whip up festive treats together. One year, instead of the usual cupcakes and cookies, we tried melting chocolate and mixing it with crushed Oreos, candy eyes, and sprinkles. The result was a hit: a crunchy, colorful bark that looked spooky and fun without taking much effort. That’s when this Easy White Chocolate Halloween Oreo Bark Recipe became our go-to tradition. Since then, it’s been the treat I make every October, whether for school parties, neighborhood gatherings, or a cozy family movie night.
Halloween is full of tempting sweets, from caramel apples to candy corn desserts, but Oreo bark has a unique charm. Unlike more complicated bakes, this recipe requires no oven time, no special molds, and no long waiting periods. You simply melt chocolate, add toppings, chill, and break into fun jagged pieces — it’s that easy! Its vibrant colors (white chocolate background sprinkled with orange, purple, and black Halloween accents) make it visually pop on any treat table. Plus, it’s incredibly budget-friendly, since Oreos and chocolate chips are easy to find at any store.
Print
Easy White Chocolate Halloween Oreo Bark Recipe
- Total Time: 45 minutes
- Yield: 16 pieces 1x
Description
A quick, no-bake Halloween treat made with melted white chocolate, crunchy Oreo pieces, candy eyeballs, and festive sprinkles. Fun to decorate, easy to customize, and perfect for parties or gift bags.
Ingredients
- 2 cups (12 oz) white chocolate chips or white candy melts
- 1 teaspoon refined coconut oil or neutral oil (optional)
- 12 Oreo cookies, roughly chopped
- 1/4 cup candy eyeballs
- 2 tablespoons Halloween sprinkles
- 1/4 cup candy corn (optional)
- 1/2 cup mini pretzels, broken (optional)
- Pinch fine sea salt
- Parchment paper, for lining
Instructions
1. Line a rimmed baking sheet with parchment paper and clear space in the fridge.
2. Microwave white chocolate with oil in 20–30 second bursts, stirring between each, until smooth.
3. Spread the melted chocolate into a roughly 1/4-inch-thick rectangle on the parchment.
4. Scatter chopped Oreos evenly over the warm chocolate and gently press to adhere.
5. Add candy eyeballs and sprinkles; include candy corn and pretzels if using. Finish with a pinch of salt.
6. Refrigerate until fully set, 30–45 minutes.
7. Break into irregular pieces or cut with a warm sharp knife for cleaner edges.
8. Store airtight up to 5 days at room temperature or 7–10 days refrigerated.
- Prep Time: 10 minutes
- Cook Time: 5 minutes
Nutrition
- Calories: 180 kcal
- Sodium: 95 mg
- Fat: 9 g
- Carbohydrates: 23 g
- Protein: 2 g
If you enjoy easy homemade Halloween treats and are looking for Halloween snacks and desserts that deliver maximum effect with minimal effort, this bark truly stands out and deserves a spot at your seasonal gatherings.
What You’ll Need for the Recipe
One of the best things about this Easy White Chocolate Halloween Oreo Bark Recipe is that the ingredient list is short, accessible, and affordable. No complicated specialty items are required — everything can be picked up on a quick grocery run or ordered online. Even better, you can easily customize it with different candies or Halloween-themed toppings. Below is a clear ingredient table so you know exactly what you’ll need:
| Ingredient | Measurement | Notes |
|---|---|---|
| White chocolate chips (or white candy melts) | 2 cups | Base of your bark. Candy melts are easier to melt; chocolate chips give a creamier flavor. |
| Oreo cookies | 12 whole cookies | Roughly chopped. Classic or seasonal orange-filled Oreos work perfectly. |
| Candy eyeballs | ¼ cup | Adds the fun, spooky effect. |
| Halloween-colored sprinkles | 2 tablespoons | Use orange, black, purple, or green varieties. |
| Candy corn (optional) | ¼ cup | Extra pop of color and chew. |
| Mini pretzels (optional) | ½ cup | A sweet-and-salty crunch. |
| Parchment paper | 1 sheet | Essential for lining tray and easy removal. |
The essentials are white chocolate and Oreos, while other toppings are all about creativity and personal preference. That’s what makes this bark one of the most fun and approachable Halloween snacks and desserts you can make.
Step-by-Step Method
- Prepare Your Pan: Line a baking sheet with parchment paper to create an even surface and easy clean-up.
- Melt the White Chocolate: Microwave chips in short bursts, stirring often, until smooth. Or use a gentle double boiler method.
- Assemble the Base: Spread melted chocolate into a rectangle about ¼-inch thick on the parchment.
- Add the Oreos: Sprinkle chopped cookies over the chocolate, pressing lightly.
- Decorate: Scatter candy eyeballs, sprinkles, and optional toppings. Invite kids to help decorate!
- Chill: Refrigerate for 30–45 minutes until firm.
- Break Into Pieces: Peel from paper and break into fun jagged chunks. For cleaner squares, cut with a warmed, sharp knife.
In just a few easy steps, you get a batch of crunchy, colorful treats perfect for party tables, school snacks, or enjoying at home after pumpkin carving.
Creative Variations to Try
One of the things that makes this Easy White Chocolate Halloween Oreo Bark Recipe so special is how customizable it is. Once you master the base of melted white chocolate and Oreo cookies, the topping options are endless. Here are a few ideas:
- Swirl Colors: Add orange, purple, or green candy melts for a marbled effect.
- Candy Corn Crunch: Sprinkle candy corn for bright pops of chewy fun.
- Sweet & Salty: Mix in pretzels or even popcorn for contrast.
- Peanut Butter Drizzle: Use melted peanut butter chips (if allergy-safe) for added flavor.
- Kids as Decorators: Set out bowls of toppings and let kids design their bark before chilling.
These variations make Oreo bark an ideal activity for group fun. If you’re searching for easy Halloween snack ideas for kids party planners, this recipe doubles as both a hands-on craft and a tasty treat.
How to Store and Serve
After making your festive bark, here’s how to keep it fresh and presentation-ready:
- Room Temperature: Airtight container for up to 5 days.
- Refrigerator: Store chilled for 7–10 days (may dull sprinkles slightly).
- Freezer: Freeze up to 2 months; thaw at room temperature before serving.
Fun Serving Ideas:
- Arrange jagged pieces on a Halloween platter surrounded by candy eyeballs.
- Bag individual servings with ribbon for school-friendly treats.
- Pair with popcorn and cider for cozy movie nights.
- Feature on dessert tables alongside cupcakes and cookies as a bright centerpiece.
When thinking about Halloween food and snacks, this recipe is a winning choice — simple, festive, and always a crowd-pleaser.
Frequently Asked Questions
Can you make Oreo bark ahead of time?
Yes! Prepare this recipe 1–2 days before your event and keep it sealed in an airtight container until serving.
How do you melt white chocolate without burning it?
Use 20–30 second microwave intervals and stir often, or set up a double boiler for gentle melting.
How long does Oreo bark last?
About 5 days at room temperature, 10 days refrigerated, or 2 months frozen.
Can I substitute milk chocolate instead?
Yes! Milk or dark chocolate work too. Combine with white chocolate for a two-toned spooky look.
Is this recipe safe for nut-free classrooms?
Definitely, as long as you choose nut-free labeled ingredients. Always double-check packaging when making for larger groups.
Wrap-Up & Final Thoughts
Halloween is all about celebrating fun, flavor, and creativity — and this Easy White Chocolate Halloween Oreo Bark Recipe captures it perfectly. With basic ingredients, no baking skills required, and endless customization, it’s a treat that comes together quickly and fits into any occasion.
From nostalgic family traditions to creative party spreads, this bark is colorful, delicious, budget-friendly, and sure to spark smiles. Break into jagged pieces, share in treat bags, or serve on a big platter — however you enjoy it, the result is always festive and fun.
So, grab some Oreos, melt that white chocolate, and unleash your Halloween creativity. This recipe is a simple seasonal win — quick, fun, festive, and unforgettable.


