When Halloween night sneaks up faster than expected, there’s nothing better than whipping up a batch of Last-Minute Halloween Mummy Cookies With Candy Eyes to save the celebration. These spooky yet adorable treats come together in minutes and bring instant charm to any Halloween dessert table. In this article, you’ll learn exactly how to create these quick Mummy Cookies With Candy Eyes from scratch or with shortcuts, decorate them like a pro, and answer all your last-minute baking questions. Whether you’re hosting a party or surprising trick-or-treaters, this guide makes Halloween baking easy, fun, and fang-tastically festive!

Childhood Halloween Treat Memories and the Charm of Mummy Cookies
A Last-Minute Halloween Tradition Comes to Life
It always seems to happen the same way—Halloween night arrives, the doorbell’s ringing with eager trick-or-treaters, and you suddenly realize you’ve forgotten to make a treat for your own little ghosts and goblins. That was me one October evening, staring into my pantry in panic until I spotted a roll of cookie dough and a bag of candy eyes. In that sweet, spooky moment, Last-Minute Halloween Mummy Cookies were born.
Within minutes, I was swirling melted chocolate across warm cookies and pressing on those goofy little eyes. Before long, my kitchen smelled like sugar and laughter—a combination that instantly turned a busy evening into a memory. These Mummy Cookies With Candy Eyes have since become a family tradition, a fun way to embrace the chaos of Halloween while adding a personal homemade touch. Every year, no matter how hectic the night, these simple treats bring smiles and a little magic to our celebration.
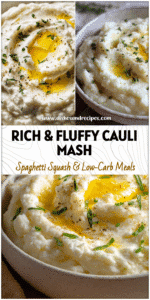
There’s something irresistibly playful about White Chocolate Mummy Cookies. Their charm lies in that creamy drizzle of melted white chocolate, carefully piped to mimic “mummy bandages,” and the candy eyes peeking through, giving each cookie its own quirky personality. They strike the perfect balance between spooky and sweet—a treat that’s just scary enough for Halloween but still adorable enough for all ages.
Print
Last-Minute Halloween Mummy Cookies With Candy Eyes
- Total Time: 25 minutes
- Yield: 24 cookies 1x
Description
These spooky yet adorable cookies are quick to make using basic pantry staples or store-bought dough. Melted white chocolate creates mummy bandages and candy eyes bring each cookie to life for a festive Halloween treat.
Ingredients
Instructions
1. Preheat the oven to 350°F (175°C) and line a baking sheet with parchment paper
2. If making dough from scratch, cream butter and sugar then beat in egg and vanilla and add dry ingredients
3. Slice store-bought sugar cookie dough into 1 1/2-inch rounds if using the shortcut
4. Place cookie rounds on the prepared sheet and bake for 8–10 minutes until edges are lightly golden
5. Transfer cookies to a wire rack and cool completely before decorating
6. Melt white chocolate chips or wafers in a microwave-safe bowl in 20-second intervals, stirring until smooth
7. Spoon melted chocolate into a piping bag or zip-top bag and cut a small corner to drizzle random overlapping lines across each cookie
8. Press two candy eyes into the chocolate before it sets and sprinkle with optional halloween sprinkles
9. Chill decorated cookies in the refrigerator for about 10 minutes until the chocolate is firm
10. Serve immediately or store in an airtight container at room temperature
- Prep Time: 15 minutes
- Cook Time: 10 minutes
- Category: dessert
- Method: baking
- Cuisine: american
Nutrition
- Serving Size: 1 cookie
Keywords: last-minute halloween mummy cookies, mummy cookies with candy eyes, white chocolate mummy cookies, easy halloween cookies, halloween mummy cookies, halloween monster cookies
As part of beloved Halloween Themed Desserts, these mummy cookies stand out because they’re endlessly customizable and hard to resist. The soft cookie base pairs beautifully with the smooth white chocolate tangle on top, while the eyes add that extra dose of fun. Kids giggle at their silly expressions, adults admire the creativity, and everyone reaches for seconds. If you’re looking for a dessert that’s as delightful to make as it is to eat, these Mummy Cookies With Candy Eyes are the ultimate last-minute Halloween hero.
Ingredients & Preparation of Halloween Mummy Cookies
Easy Ingredients You Already Have at Home
Simple Ingredients for Fast & Fun Halloween Cookies
The best part about these Last-Minute Mummy Cookies is that you probably already have everything you need right in your kitchen. You can use your favorite homemade sugar cookie recipe or grab a roll of store-bought dough to keep things quick and easy. These Easy Halloween Cookies mix simple pantry staples with a touch of spooky creativity.
| Ingredient | Amount | Notes / Substitution |
|---|---|---|
| All-purpose flour (if making from scratch) | 2 ½ cups | Basic cookie base ingredient |
| Baking powder | 1 tsp | Helps cookies rise slightly |
| Salt | ¼ tsp | Balances sweetness |
| Unsalted butter | 1 cup (softened) | Substitute with margarine if needed |
| Granulated sugar | 1 cup | Can mix half white, half brown sugar |
| Vanilla extract | 1 tsp | Adds warmth and flavor |
| Egg | 1 large | Binds the dough |
| Store-bought sugar cookie dough (optional) | 1 roll | Shortcut option for Last-Minute Halloween Mummy Cookies |
| White chocolate chips or melting wafers | 1 ½ cups | For the signature “mummy wrap” |
| Candy eyes | About 40 pairs | Brings the mummies to life |
| Halloween sprinkles (optional) | As desired | Adds festive color for Easy Halloween Cookies |
This recipe is flexible—use what you have, swap flavors, or mix pre-made dough with your own twist. The goal is fast, fun, and frightfully delicious cookies ready in no time.
Essential Tools for Perfect Mummy Cookies
To bring your Mummy Cookies With Candy Eyes to life, having the right tools will make your workflow smooth and efficient. These are simple items found in most kitchens, ideal for a speedy Halloween bake session:
- Baking sheets – for even baking.
- Parchment paper or silicone mats – prevents sticking and makes cleanup easy.
- Mixing bowls & hand mixer – quick dough preparation.
- Cooling rack – cools cookies before decorating.
- Microwave-safe bowl – for melting white chocolate.
- Spoon or spatula – stir and spread chocolate.
- Piping bag or zip-top bag – drizzle mummy-like bands.
- Small tongs or tweezers – for placing candy eyes neatly.
Step-by-Step: Making White Chocolate Mummy Cookies at Home
Baking the Cookies
- Preheat oven to 350°F (175°C). Line a baking sheet with parchment paper.
- Prepare the dough. If making from scratch, cream butter and sugar, beat in egg and vanilla, then add dry ingredients. Or slice ready-made dough into rounds.
- Shape cookies to about 1½ inches.
- Bake 8–10 minutes until edges are lightly golden. Last-Minute Halloween Mummy Cookies bake fast—keep soft, not crispy.
- Cool completely on a wire rack before decorating.
Pro Tip: Bake one sheet while decorating another to save time—that’s the real secret to quick Mummy Cookies With Candy Eyes!
Decorating the Cookies Like a Pro
- Melt white chocolate in 20–30 second microwave intervals, stirring until smooth.
- Transfer to a piping bag and snip a small tip.
- Drizzle across cookies in random overlapping lines for “bandages.”
- Press on candy eyes before chocolate sets.
- Add sprinkles for color and festive flair.
- Chill 10 minutes to harden chocolate.
Within minutes, you’ll have White Chocolate Mummy Cookies—each one unique, delicious, and ready to steal the show!
Tips, Tricks & Creative Variations
Adding Extra Spooky Fun
Fun Flavors and Halloween Themes
Once you’ve mastered the basics, experiment with creative twists on your Mummy Cookies With Candy Eyes. Turn them into Easy Halloween Monster Cookies by mixing flavors and decorations:
- Peanut Butter Mummies: Salty-sweet contrast with white chocolate drizzle.
- Pumpkin Spice Edition: Add pumpkin pie spice and cinnamon for fall flavor.
- Chocolate Chip Mummies: Chocolate chips peek through the bandages.
Play with candy eyes—different sizes or colors create fun personalities. Add orange candy melts or black frosting for contrast. A mix of White Chocolate Mummy Cookies and orange “pumpkin” mummies can make your dessert table pop with festive color. There’s no wrong way to do it—the messier, the better!
Quick Fixes When You’re Out of Time
Halloween chaos calls for dessert magic in minutes. Use store-bought cookies like shortbread rounds, drizzle with melted candy melts, and add eyes—instant Last-Minute Halloween Mummy Cookies success. No piping bag? A zip-top bag snipped at the corner or even a fork works perfectly. Missing candy eyes? Mini chocolate chips stick on easily with melted chocolate.
Even if melting chocolate feels like too much, white frosting or icing tubes will save the day. Keep it stress-free—these Mummy Cookies With Candy Eyes are meant to be fun, not fussy!
Serving, Storing & Gifting Ideas for Halloween Parties
How to Display on the Dessert Table
Presentation elevates your Halloween Mummy Cookies. Place them on black or orange trays surrounded by cobweb decorations, pumpkins, or plastic spiders. Arrange them so their eyes “look” at your guests—it’s creepy-cute perfection! For trick-or-treaters, wrap individually in clear bags tied with spooky ribbons and tags like “From Our Mummy to Yours!” for an unforgettable personal touch.
Make-Ahead and Storage Tips
Plan ahead without stress. Bake cookies a day or two early and store in an airtight container. Decorate when ready to serve. They stay soft up to five days. Want longer storage? Freeze plain cookies for three months and decorate later for fresh-tasting Halloween Monster Cookies anytime. Use parchment between layers to protect the chocolate drizzle and candy eyes.
These treats also travel well. Pack neatly for gifts—opening a package of googly-eyed Mummy Cookies With Candy Eyes is sure to brighten anyone’s Halloween!
Common Questions & Final Thoughts
FAQ Section
1. Can I make Mummy Cookies ahead of Halloween night?
Yes! Bake and decorate one or two days beforehand. Store in airtight containers once chocolate sets fully.
2. What kind of white chocolate works best for Mummy Cookies With Candy Eyes?
Premium white chocolate chips or melting wafers melt smoothly and shine beautifully. Candy melts give a bright white finish perfect for White Chocolate Mummy Cookies.
3. Can I use different cookie dough flavors for Halloween Mummy Cookies?
Absolutely! Try peanut butter, chocolate chip, or pumpkin spice dough for tasty twists. Flat cookies help keep decorations stable.
4. How long will these Mummy Cookies stay fresh?
Stored properly, Last-Minute Halloween Mummy Cookies stay delicious for up to five days at room temperature or freeze plain bases for months.
5. What’s the fastest way to decorate Last-Minute Halloween Mummy Cookies?
Use store-bought cookies, candy melts, and candy eyes. In 10 minutes, you’ll have charming Mummy Cookies With Candy Eyes that everyone will love.
Conclusion
And there you have it—a complete, stress-free guide to making Last-Minute Halloween Mummy Cookies With Candy Eyes. From the first inspired story to practical baking steps, clever shortcuts, and presentation ideas, these cookies embody everything fun about Halloween.
Whether you’re making White Chocolate Mummy Cookies for a party or Easy Halloween Cookies with your kids, the joy comes from creativity and laughter, not perfection. So next time Halloween sneaks up, grab your candy eyes, melt that chocolate, and create delicious Halloween Monster Cookies that will make your spooky celebration unforgettable!